About the Feature
After confirming and delivering a medication order, same can be returned back partially or fully to the respective inventory in the desired batch. User can refund the invoice for the returned medicines too.
Following The following steps and screenshots are explained as per Odoo 10, available on Bahmni 0.92 release.
Used By
This feature is used by Pharmacists and Cashiers in a hospital pharmacy.
How is it Used?
1. Returning the medicine
Go to the Odoo - “Sales Order” screen under the “Sales” menu, which will be listing the confirmed medication sale orders.
Search for the desired patient’s sale order and click on the same, to view the respective details.
Click on the “Delivery” button appearing at the top right side.

In the “Delivery” screen, you can view the delivered quantity in the “Done” column for the listed products.
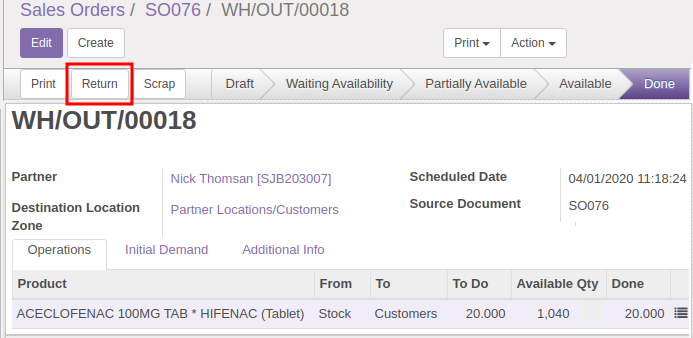
Click on the “Return” button appearing at the top left side of the screen.
Update the quantity of drug to return in the “Quantity” field under the “Reverse Transfer” popup.
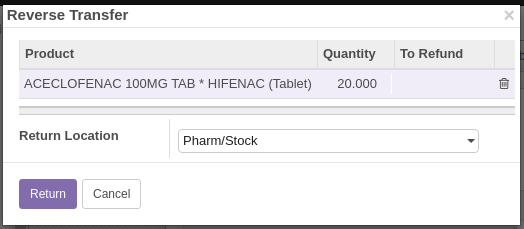
Click on the “Return” button appearing at the bottom left corner of the popup.
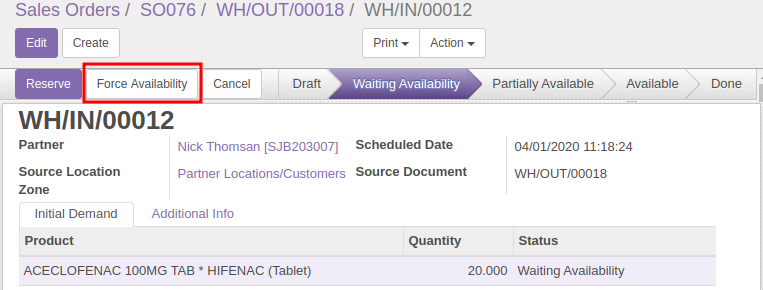
Click on the “Force Availability” button appearing at the top left side of the screen.
Open “Operations” tab and click on the list icon appearing in the product grid.
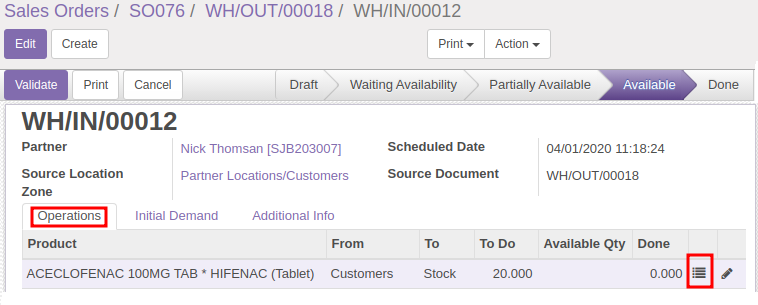
Click on “Add an Item” link in the “Lot/Serial Number Details” popup, select the desired lot in which you want to add the returned quantity of drugs and enter the same quantity in the “Done” field.
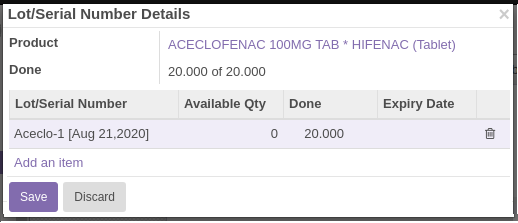
Click on the “Save” button in the popup and then click on “Validate” button in the top left side of the screen.
2. Refunding the Invoice
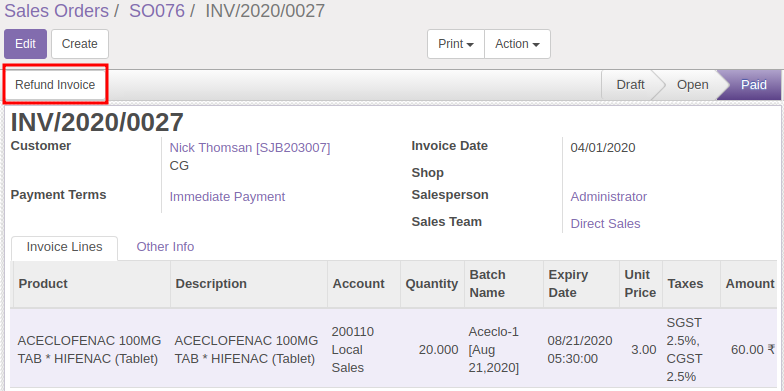
To refund the invoice, click on the “Invoices” button appearing at the top right side for the confirmed sales order.
Click on the “Refund Invoice” button appearing at the top left side of the screen.
Select the desired “Refund Method” in the “Refund Invoice” popup.
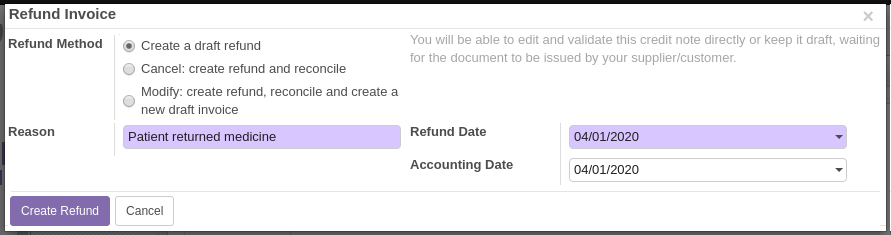
Enter the Refund Reason and Date in the respective fields accordingly and click on the “Create Refund” button at the bottom left side of the popup.
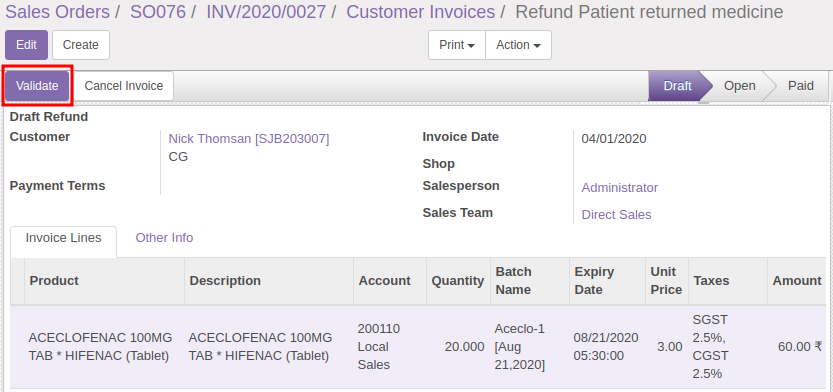
Open the Draft Refund record, click on the “Validate” button appearing at the top right side of the screen and then click on the “Register Payment” button.
Select the Payment Journal and enter the Payment Amount in the respective fields under “Register Payment” popup and then click on “Validate” button appearing at the bottom left side of the popup.
You can print the Refund Invoice by clicking the “Print” button and selecting the “Invoices” option.
| Table of Contents |
|---|
| Info |
|---|
Feature Details |
| Info |
|---|
Implementation Details |