Introduction
| Warning | |||||||
|---|---|---|---|---|---|---|---|
| |||||||
There's been a security advisory from OpenMRS for webservices.rest module. As part of security Advisory, who ever planning to install Bahmni or already have installed Bahmni of versions 0.89, v0.90, v0.91 those have to replace existing webservices.rest module with 2.24.0 version module.
For more details on security advisory, please refer to below talk threads https://talk.openmrs.org/t/critical-security-advisory-cve-2018-19276-2019-02-04/21607 https://talk.openmrs.org/t/update-for-cve-2018-19276-2019-02-04/21682 |
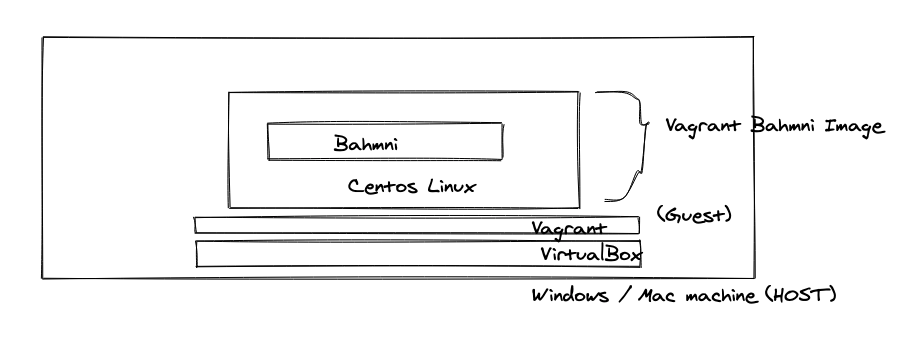
Whether you use Windows, Linux or Mac, you can use this process to have Bahmni running on your machine for Testing or Development. Note that it is NOT recommended to use this in production. The idea is to download the Bahmni Virtual (Vagrant) Box which is pre-installed with CentOS, and all softwares. To make the vagrant box run on your machine you will need Virtual Box, Vagrant and GIT installed (See steps below). Once you have this Vagrant box running, you can then make changes to file in the box, and see them reflect immediately. If you still wish to go ahead, and make code changes, and deploy them - then development setup will be needed, so that you can modify files in your base OS, and run them inside the Vagrant box after recompilation.
| Tip | ||
|---|---|---|
| ||
For development purposes we use Vagrant and Virtual Box. The vagrant box for v0.92 Bahmni should be Centos 7.6. To understand Vagrant better, you can read the following links: |
| Tip | ||
|---|---|---|
| ||
Please read the document: High Level Deployment Architecture of Bahmni, to understand the major components that are present in the Virtual Box for Bahmni |
| Info |
|---|
The latest version of Bahmni is v0.93 |
| Tip | ||||
|---|---|---|---|---|
| ||||
|

Perform the following steps to get Bahmni VM setup on your computer
| Tip | ||
|---|---|---|
| ||
You can watch a video on how to setup Bahmni with Virtual Box / Vagrant here: (Youtube Video). This video is created for Windows, but the steps are similar for Linux and Mac systems too. |
| Tip | ||
|---|---|---|
| ||
If you have another Bahmni Vagrant box (in your team or another location on network) then you can save time by not downloading the vagrant. See steps given in the section Transferring your Vagrant box to another machine |
| Tip | ||
|---|---|---|
| ||
You may encounter issues while setting up VirtualBox on Windows and we encourage you to do your Bahmni related FOSS development on Un*x platforms. |
| Tip | ||
|---|---|---|
| ||
You may encounter issues while setting up Virtualbox on Ubuntu 16.04 with a dual boot Windows 10. Please read this article https://stegard.net/2016/10/virtualbox-secure-boot-ubuntu-fail/ and discussion on https://askubuntu.com/questions/900118/vboxdrv-sh-failed-modprobe-vboxdrv-failed-please-use-dmesg-to-find-out-why/9736621 before installing virtualbox. |
Step 1: Install Git, Virtual Box and Vagrant on your computer
| Note |
|---|
There is a known issue with Vagrant on Windows10. Please read this discussion to understand what you need to do: https://talk.openmrs.org/t/unable-to-download-vagrant-box-cannot-find-box-error-windows-10/6734/2 before installing vagrant. For users running Windows 7/8, you may be |
- Git: http://git-scm.com/book/en/v2/Getting-Started-Installing-Git
VirtualBox:https://www.virtualbox.org/wiki/Downloads
Vagrant: https://www.vagrantup.com/downloads.html (Please install Vagrant version 1.7 or newer, 2.0.2 is the recommended version)
Step 2: Create a folder bahmni where you would like all project related files to be present
| Code Block |
|---|
cd /Projects mkdir bahmni |
Step 3: Clone the following projects from Github inside the newly created folder bahmni
| Code Block | ||
|---|---|---|
| ||
cd bahmni git clone https://github.com/Bahmni/bahmni-vagrant.git |
Step 4: From within directory bahmni-vagrant execute "vagrant up" command
This command will download a CentOS Vagrant Box from the internet, and install it on your machine ('vagrant box list' command shows a list of locally installed boxes).
| Code Block | ||
|---|---|---|
| ||
cd bahmni-vagrant # Make sure that the command prompt is running "As Administrator" otherwise the next command vagrant up will hang on 'Clearing any previously set network interfaces'. #This command will download the Vagrant box from Atlas first time. Next time onwards, the already downloaded vagrant box will be used. # The download box size is about 2.5 GB. Please ensure you have a good and stable internet connection to download the box. Usually vagrant will continue download from where it got disconnected. vagrant up |
| Warning | ||
|---|---|---|
| ||
If the vagrant up command throws some error, please refer to the following page for possible error resolution: Vagrant and VirtualBox tips |
| Note |
|---|
If download of the box fails in the step above, and you wish to directly download the box using a downloader utility, then you can try the steps documented here: Direct Download of Vagrant Box. |
Step 5: You should have Bahmni up and running, and accessible on the below mentioned links
| Tip |
|---|
If any service isn't running, then maybe you won't see the login screen. Please start that service, and then check. For details on all services in Bahmni, please refer to this document: Install Bahmni on CentOS (Services) |
| Note | ||
|---|---|---|
| ||
When you first access the web application your browser may show a warning about an invalid security certificate, and that your connection is not secure / private. If you are testing or evaluating Bahmni you may get around this by using a self-signed certificate or adding a security exception/choosing to proceed to the site (this varies across web browsers). Otherwise please read the following document for recommended guidelines on generating SSL certificates for securing Bahmni access over HTTPS connections: Configure Valid SSL Certificates. In Firefox browser, the Advanced link will allow you to continue forward. In Chrome you may need to run the browser with temporarily disable warning (read this). For security, please don't disable this on browser permanently. |
| Application | Link | Credentials | Screenshot |
|---|---|---|---|
| Bahmni Home Landing Page | https://192.168.33.10/ | - |
|
| Bahmni EMR & Clinical UI | superman/Admin123 | 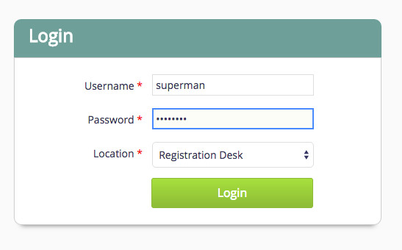 | |
| Lab System (OpenELIS) | admin/adminADMIN! | 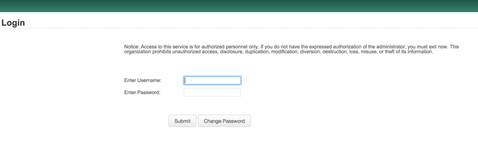 | |
| ERP System (Odoo) - Billing and Inventory | http://192.168.33.10:8069/ | admin/admin Note: On v0.91 this would go to OpenERP whose credentials are: admin/password (Choose Database "openerp" in top right corner). |
|
| OpenMRS - Configuration | https://192.168.33.10/openmrs/ | superman/Admin123 | 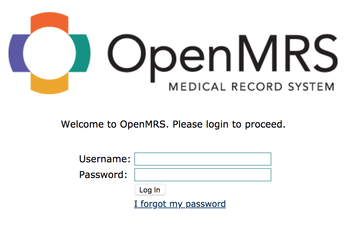 |


| Warning | ||
|---|---|---|
| ||
The current "Vagrantfile" is configured with only 3GB RAM. To make all services run well, usually > 4GB is needed. If your host machine has more RAM, please consider increasing the RAM allocated to your Vagrant box. For doing that, please edit this line in your vagrant file: https://github.com/Bahmni/bahmni-vagrant/blob/a77aeb95791d8fcd2d2235f8e8f3206e7b8d2cc4/Vagrantfile#L11. Change the value of "--memory" 3092 to a higher value (in KB). (See System Requirements#Testinstallations) |
Step 6: To halt the VM, you can use the "vagrant halt" command
| Code Block | ||
|---|---|---|
| ||
cd bahmni-vagrant vagrant halt # Use 'vagrant up' next time, to restart the box. |
Working Inside the Bahmni Vagrant Box
| Panel | |||||
|---|---|---|---|---|---|
| |||||
Once you have vagrant running successfully, you can ssh into it, and browse the following directories. Please refer to this document, to understand the various folders in a typical Bahmni installation on CentOS.
|
Starting / Stopping your Vagrant Box
| Code Block |
|---|
cd bahmni-vagrant # Stops your vagrant box (and remembers all file system changes) vagrant halt # Brings your vagrant back on (if you did 'vagrant halt' earlier to stop) vagrant up # Destroy and free up space - Any changes you made inside the vagrant will also be lost vagrant destroy # Creates and starts a fresh box (won't download anything) from the originally downloaded Bahmni box template vagrant up |
Updating your Vagrant Box to the Latest Version
If you already have a Bahmni vagrant box on your machine, but would like to update to the latest published box, please perform the following steps.
| Code Block |
|---|
cd bahmni-vagrant vagrant halt # See which versions of Bahmni vagrant box are installed on the machine vagrant box list # Warning!! This will destroy any changes you made in the vagrant box vagrant destroy # (Optional Step) Delete the box template of a specific version if you don't want it, or you want to download it again vagrant box remove bahmni-team/bahmni --box-version="0.81" # Will search and download the latest Bahmni vagrant box (about 1.5GB +) vagrant box update # You new box should come up now vagrant up |
| Anchor | ||||
|---|---|---|---|---|
|
Transferring your Vagrant box to another machine
If you wish to transfer the same vagrant box from your machine to another machine, you can also do that. This has the following advantages:
- Any data you setup in your vagrant box will also be available to the other box/machine.
- If the other machine doesn't have fast internet access, then also you can perform this machine to machine box transfer, and save on bandwidth.
- Its quicker than downloading the whole box!
Steps to perform:
Reference document: https://www.dev-metal.com/copy-duplicate-vagrant-box/
Create Reference Box: Create a new vagrant box that has everything from your box packaged into it using the following commands:
Code Block # Execute these commands from the same folder where your vagrant box is kept. # Halt vagrant vagrant halt # Create a new .box. This will create a package.box file vagrant package
- Use Box on Target Machine: On the new machine, perform the following steps:
- Create a new folder, say: "D:/my-bahmni-vagrant"
- Copy over the "package.box" file and "Vagrantfile" from your machine into the above folder.
Edit the Vagrantfile and do the following:
Code Block # Change this value as below config.vm.box = "my-bahmni-box" # Add this line to point the url to the package.box config.vm.box_url = "file:///d:/my-bahmni-vagrant/package.box"
- Save the Vagrant file and execute "vagrant up" command.
Now the vagrant box on the new machine should be up. You can repeat step 2 on other machines, now that you have a package.box as reference for others.
Direct Download of Vagrant Box
If you are unable to download the box using the "vagrant up" command, you can choose to download it via some other downloader utility directly using this link:
v0.93.2: https://app.vagrantup.com/bahmni-team/boxes/bahmni/versions/0.93.2/providers/virtualbox.box
v0.93.1: https://app.vagrantup.com/bahmni-team/boxes/bahmni/versions/0.93.1/providers/virtualbox.box
v0.93: https://app.vagrantup.com/bahmni-team/boxes/bahmni/versions/0.93/providers/virtualbox.box
v 0.92: https://app.vagrantup.com/bahmni-team/boxes/bahmni/versions/0.92/providers/virtualbox.box
v 0.91: https://app.vagrantup.com/bahmni-team/boxes/bahmni/versions/0.91/providers/virtualbox.box
v 0.90: https://app.vagrantup.com/bahmni-team/boxes/bahmni/versions/0.90/providers/virtualbox.box
v 0.89: https://app.vagrantup.com/bahmni-team/boxes/bahmni/versions/0.89/providers/virtualbox.box
v 0.88: https://app.vagrantup.com/bahmni-team/boxes/bahmni/versions/0.88/providers/virtualbox.box
v 0.87: https://app.vagrantup.com/bahmni-team/boxes/bahmni/versions/0.87/providers/virtualbox.box
v 0.86: https://app.vagrantup.com/bahmni-team/boxes/bahmni/versions/0.86/providers/virtualbox.box
v 0.85: https://app.vagrantup.com/bahmni-team/boxes/bahmni/versions/0.85/providers/virtualbox.box
v 0.83: https://app.vagrantup.com/bahmni-team/boxes/bahmni/versions/0.83/providers/virtualbox.box
After download, rename the box to "package.box". Place the box in your "bahmni-vagrant" folder, and edit the Vagrant file as below:
| Code Block | ||
|---|---|---|
| ||
# Change this value as below config.vm.box = "my-bahmni-box" # Add this line to point the url to the package.box config.vm.box_url = "file:///d:/my-bahmni-vagrant/package.box" |
Now save the Vagrantfile. And then execute the "vagrant up" command.
From Bahmni v0.89, the Bahmni virtualbox comes with oh-my-zsh shell, Git installed. This will helpful for the newbies to navigate inside vagrant box. For details check this PR.
| Panel | ||||||
|---|---|---|---|---|---|---|
| ||||||
Unable to Fetch Location Error Installing Bahmni on CentOS Box |