About the View
The calendar view is a visual representation of the appointments booked against providers in a given day. This will help them to see what appointments are already scheduled versus what slots are available.
All the appointments booked for one provider are indicated on one column and the appointments are colour coded based on the service they have been booked for. Thus providers can get an overview of the upcoming appointments and plan accordingly.
How is it used
- Firstly, the calendar view must be turned for a user to view the calendar in the appointment scheduling module. You will find steps to turn on and configure a calendar view here.
- To access the calendar view Click on the "Manage Appointments" Tab in the appointment scheduling app and then click on the "Appointments List" tab. By default, this will land the user on the Calendar view, if it is turned on.

3. The calendar, by default takes you to the current day. One can use the date picker to navigate across days. Clicking on the "Today" button will take the user to the current day.
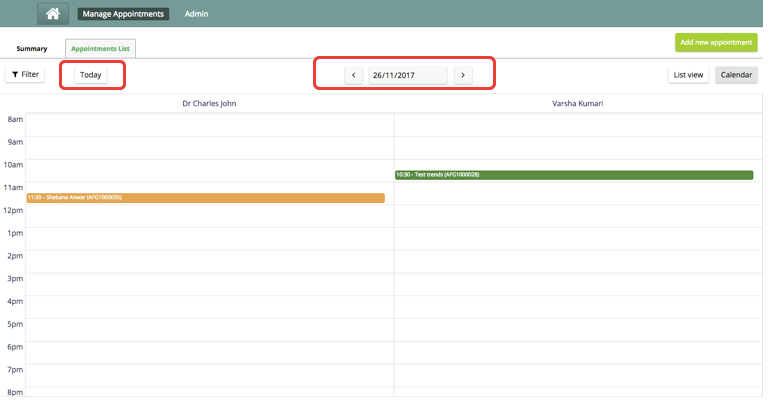
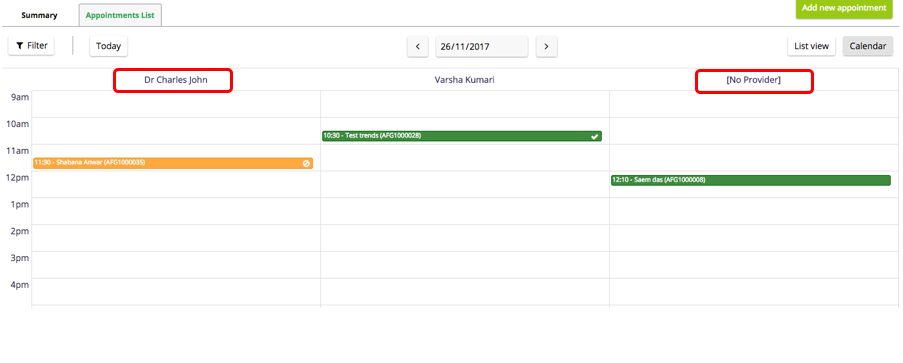
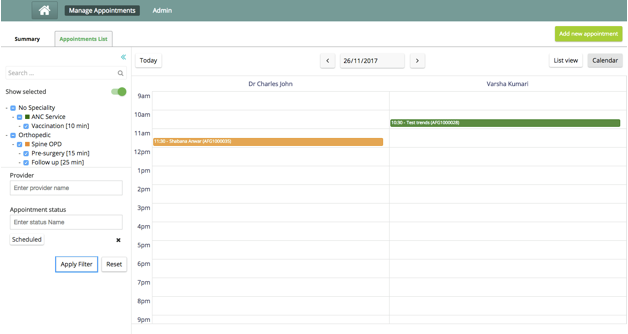
4. For a given day, all the appointments for the day are grouped across the provider columns and displayed. If there exists any appointment without provider for a given day - this list shall appear on "No Provider" column.
5. The appointments of a service appear in a label colour configured for the service. The slots duration and the label intervals of the calendar are displayed according to the parameters set as described here. For e.g in the screenshot below , Label interval is of 1hour and the Slots are of 30 mins each.
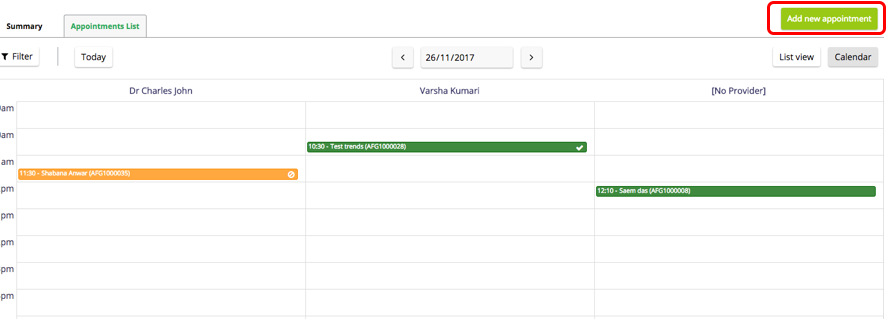
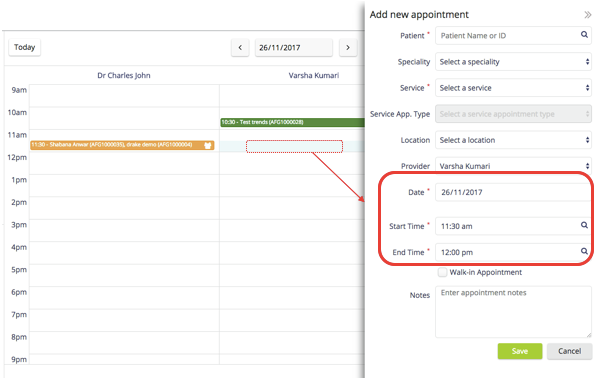
6. Create a new appointment: There are 2 ways to create an appointment from the Calendar view:
- The add new appointment Button on top right - This will open a side panel to create a new appointment
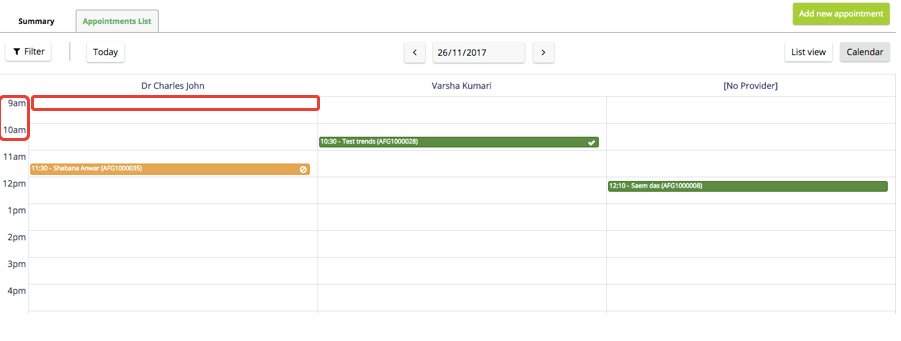
- Clicking on a slot in the calendar - In case of an empty slot, this will open a side panel, but with information from the calendar slot pre-populated - E.g Date, Start and end time, Provider. When we Click on a occupied slot - This will open a pop up. there will be an Add new appointment button. Clicking on it will open the side panel, but with information pre-populated.
Services are not pre-populated. It is expected of the user to fill the service explicitly. To know more about creating appointments, click here.

7. When there are multiple appointments in the same slot for a provider, the patients appear as comma separated in the coloured slot.
8. Clicking on a slot opens up a pop up to change the status of the appointment. In case of multiple patients in a slot, there is a dropdown to select the patient and then proceed with the status change actions. The status buttons are enabled as per the appointment selected.
To know more about managing appointments and allowed status validations, click here.
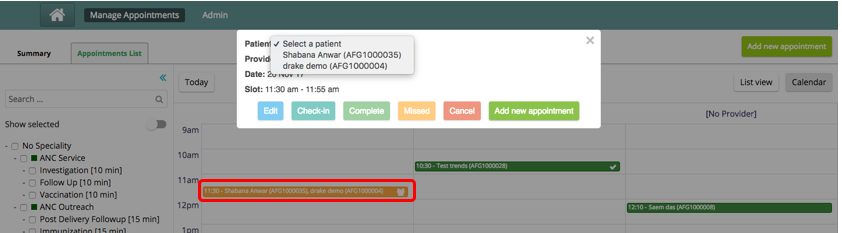
9. Missed and Completed appointments have an indication on the calendar to depict their status. Canceled appointments are not visible on a Calendar.

10. Appointments in the calendar view can also be filtered in the same way as the list view.
| Panel | ||
|---|---|---|
| ||
|