Versions Compared
Key
- This line was added.
- This line was removed.
- Formatting was changed.
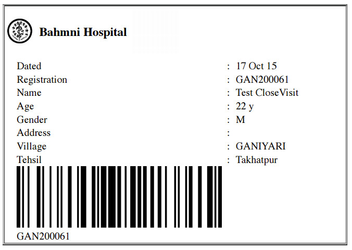
Steps to generate Barcode in the Print
Download JsBarcode.all.min.js and include in the html script tag
| Code Block |
|---|
<script src="{{path}}/JsBarcode.all.min.js"></script> |
| Note |
|---|
path = the path of the downloaded file (JSBarcode.all.min.js). One can choose different files from https://github.com/lindell/JsBarcode depending on the configurations |
Create an image tag with parameter jsbarcode-value which holds the value that can be used to generate the barcode.
| Code Block |
|---|
<img id="barcode"
  jsbarcode-value="{{patient.primaryIdentifier.identifier}}"
</img> |
| Info |
|---|
In above code snippet, patient.primaryIdentifier.identifier will hold the identifier of the patient. This identifier which is alphanumeric (most cases) is used to generate the barcode. |
| Note |
|---|
One can choose to give different configurations for the size of the barcode and the position etc. Please refer https://github.com/lindell/JsBarcode/wiki/Options |
Initialize the barcode generation by adding below mentioned script tag
| Code Block |
|---|
<script>
  (function() {
     JsBarcode("#barcode").init();
  })();
</script> |
| Tip |
|---|
Sample html page with the above mentioned configurations |

| Warning |
|---|
This is not for Printing on Registration ID card. This works for normal printer. |
| Panel | ||||||
|---|---|---|---|---|---|---|
| ||||||