Install and configure DHIS2 integration app
Assuming you have Bahmni installer latest version installed and running successfully. (Tested with 0.89 version, should work with previous version as well)
Run the following command to install DHIS2 integration app.Download and install dhis-integration rpm from https://github.com/Possiblehealth/possible-artifacts/blob/master/90-artifacts/dhis-integration-1.0-1.noarch.rpm
Code Block language bash theme Emacs yum install https://s3.ap-south-1.amazonaws.com/possible-artifacts/dhis-integration-1.0-1.noarch.rpmUpdate the properties file for DHIS2 integration app, located at '/etc/dhis-integration/dhis-integration.yml', with right configuration.
Key Description Example openmrs.root.url Url to access Openmrs service http://localhost:8050/openmrs/ws/rest/v1 bahmni.login.url When user isn't logged in, then user is redirected to this url. https://ehr.possible.org/bahmni/home/#/login?showLoginMessage
reports.url Bahmni reports url. Used for downloading reports. https://ehr.possible.org/bahmnireports/report reports.json This file contains configurations of DHIS2 reports.
/var/www/bahmni_config/openmrs/apps/reports/reports.json dhis.config.directory This folder contains DHIS2 integration configurations program wise. /var/www/bahmni_config/dhis2/ dhis.url The DHIS2 government server instance url. Ex. 1: http://100.100.100.100:8080/
Ex. 2: http://200.100.20.30:8888/hmistest/
Note that the url could be at domain or ip address level (ex1) or could be at a specific path(ex2)
dhis.user The username to access DHIS2 instance. username
dhis.password The password for the DHIS2 user. password
openmrs.db.url Mysql connection url to access "openmrs" database. Set valid user and password in the url. jdbc:mysql://localhost/openmrs?user=openmrs-user&password=password
submission.audit.folder All DHIS2 submissions are stored in this directory. Ensure the directory exists and "bahmni" user has access to it, or configure a different directory. /dhis-integration-data
server.port Server config. Port for server to listen to. 8040
server.context-path Server config. Mapping incoming requests. /dhis-integration/
log4j.config.file Server config. Properties file for logger of dhis-integration server. log4j.properties
Download and place the ssl.conf file.
Code Block language bash theme Emacs cd /etc/httpd/conf.d/ wget https://raw.githubusercontent.com/Possiblehealth/possible-config/89662e8e823fac3dbcaf111aa72713a63139bb03/playbooks/roles/possible-dhis-integration/templates/dhis_integration_ssl.conf
Configure Bahmni landing page to show DHIS2 integration app.
Insert the following in "/var/www/bahmni_config/openmrs/apps/home/extension.json" fileCode Block language text theme Emacs "possible_dhis_2_integration": { "id": "possible.dhis2Integration", "extensionPointId": "org.bahmni.home.dashboard", "type": "link", "label": "DHIS2 integration", "url": "/dhis-integration/index.html", "icon": "fa-book", "order": 11, "requiredPrivilege": "app:reports" }Ensure Bahmni reports service is installed and running successfully.
Code Block language bash theme Emacs service bahmni-reports status ##should be running
Restart ssl and dhis-integration services.
Code Block language bash theme Emacs service httpd restart service dhis-integration restart
Now the DHIS2 integration app is available on landing screen, given that the user has reporting privileges.

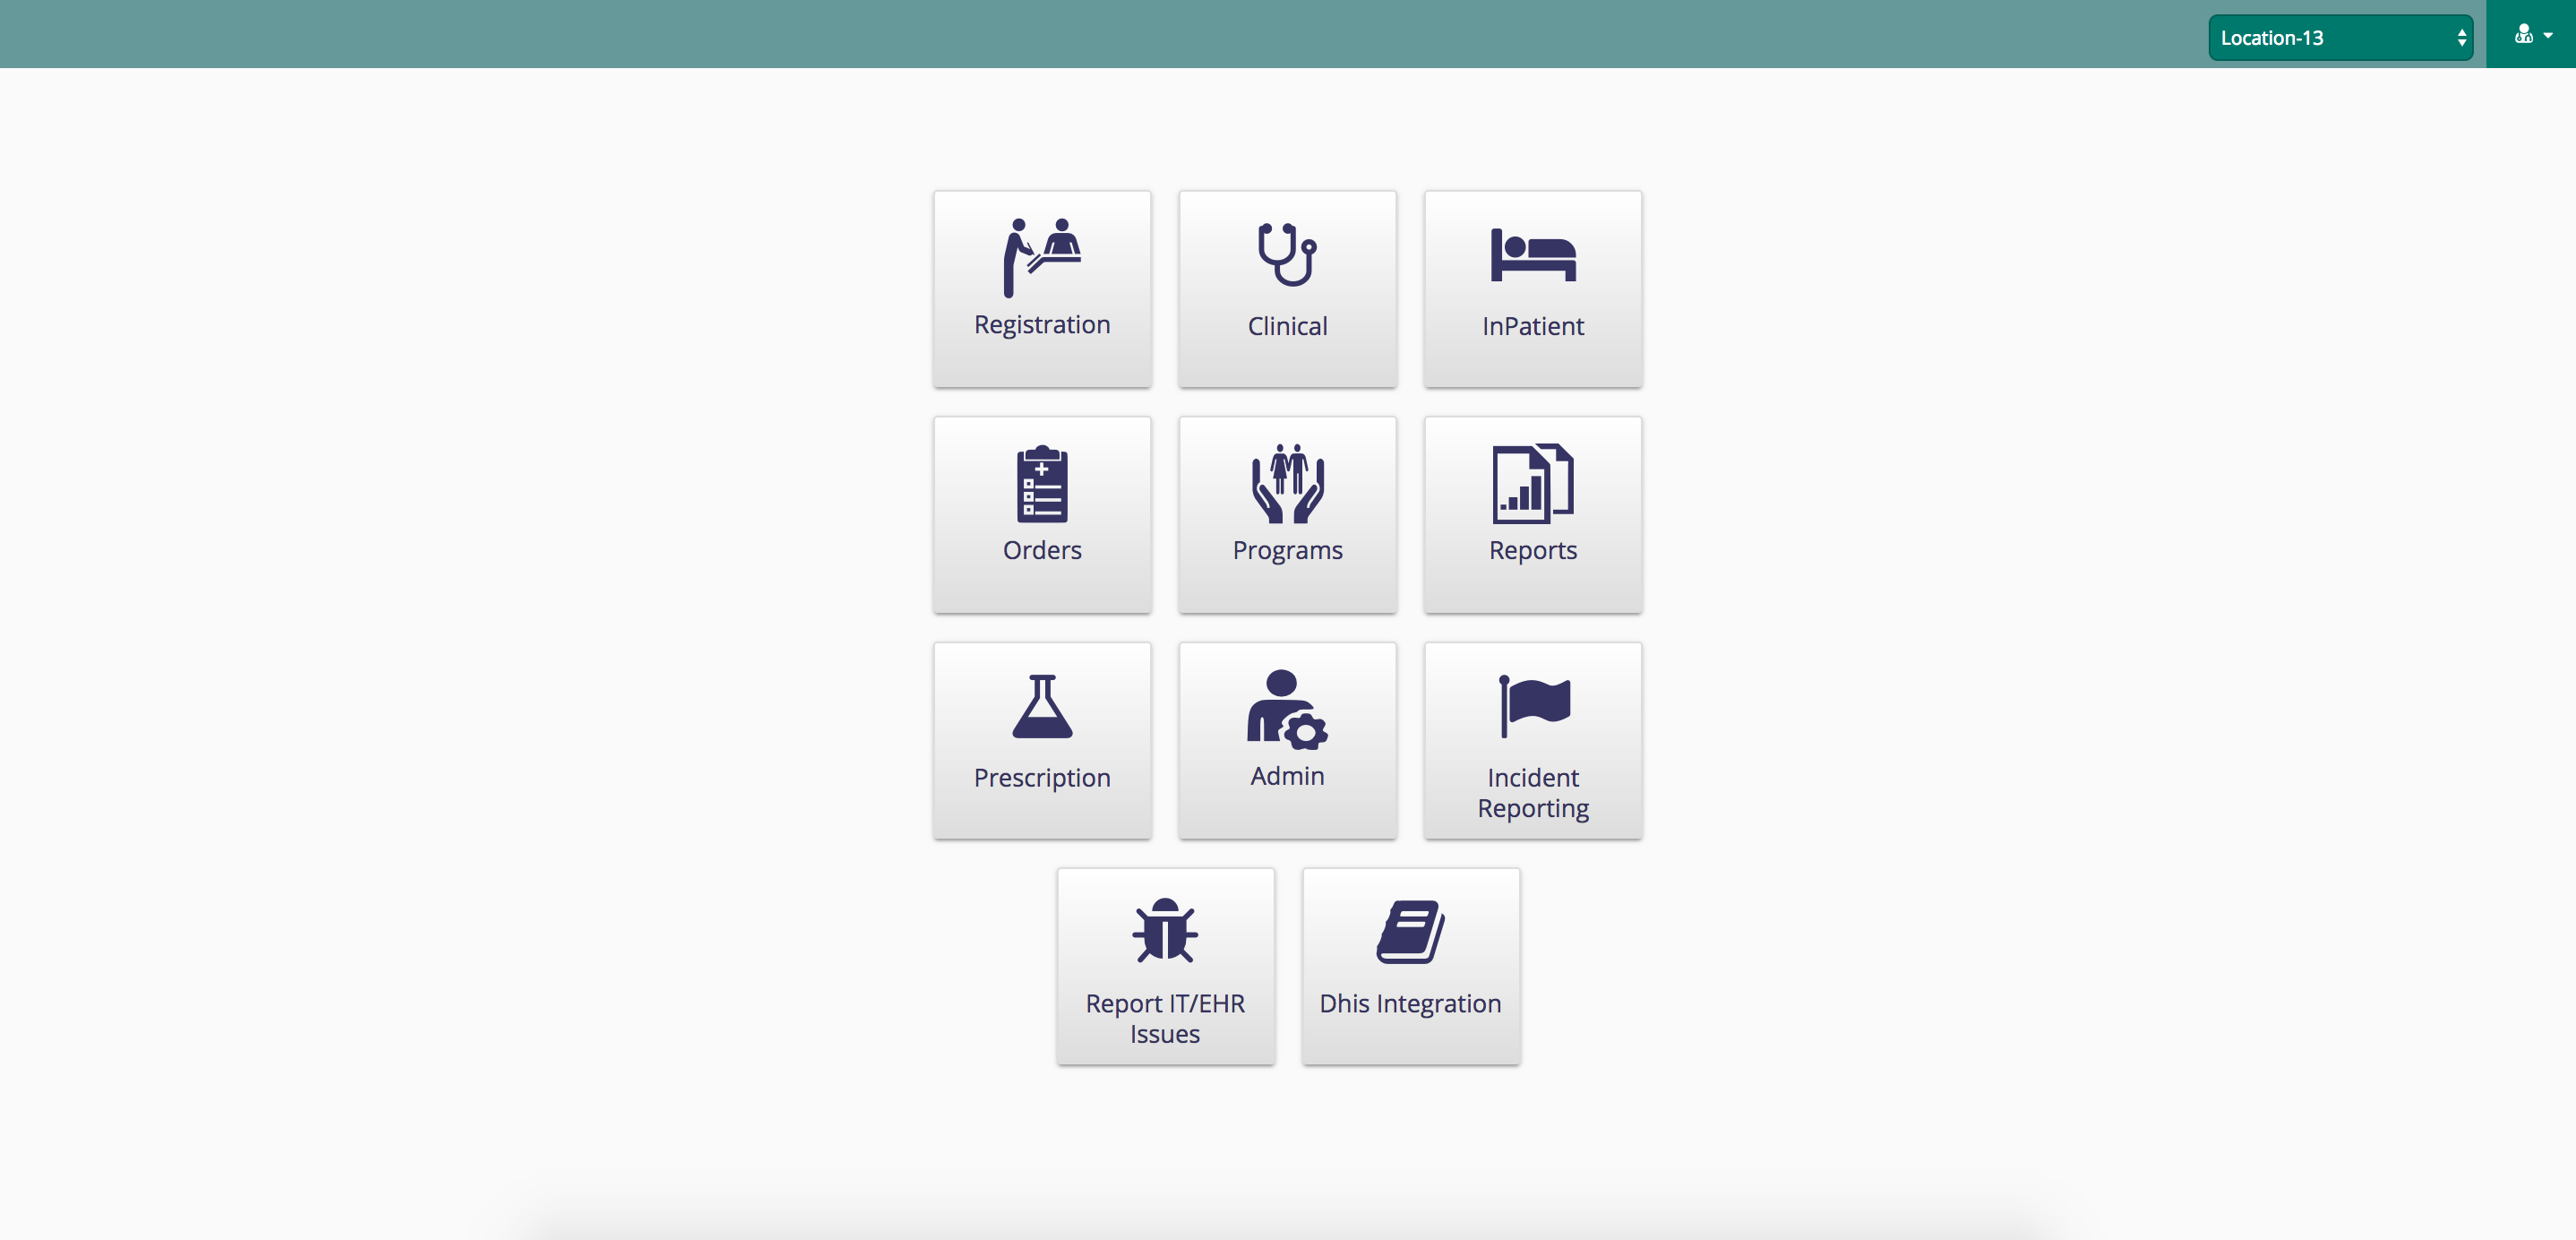
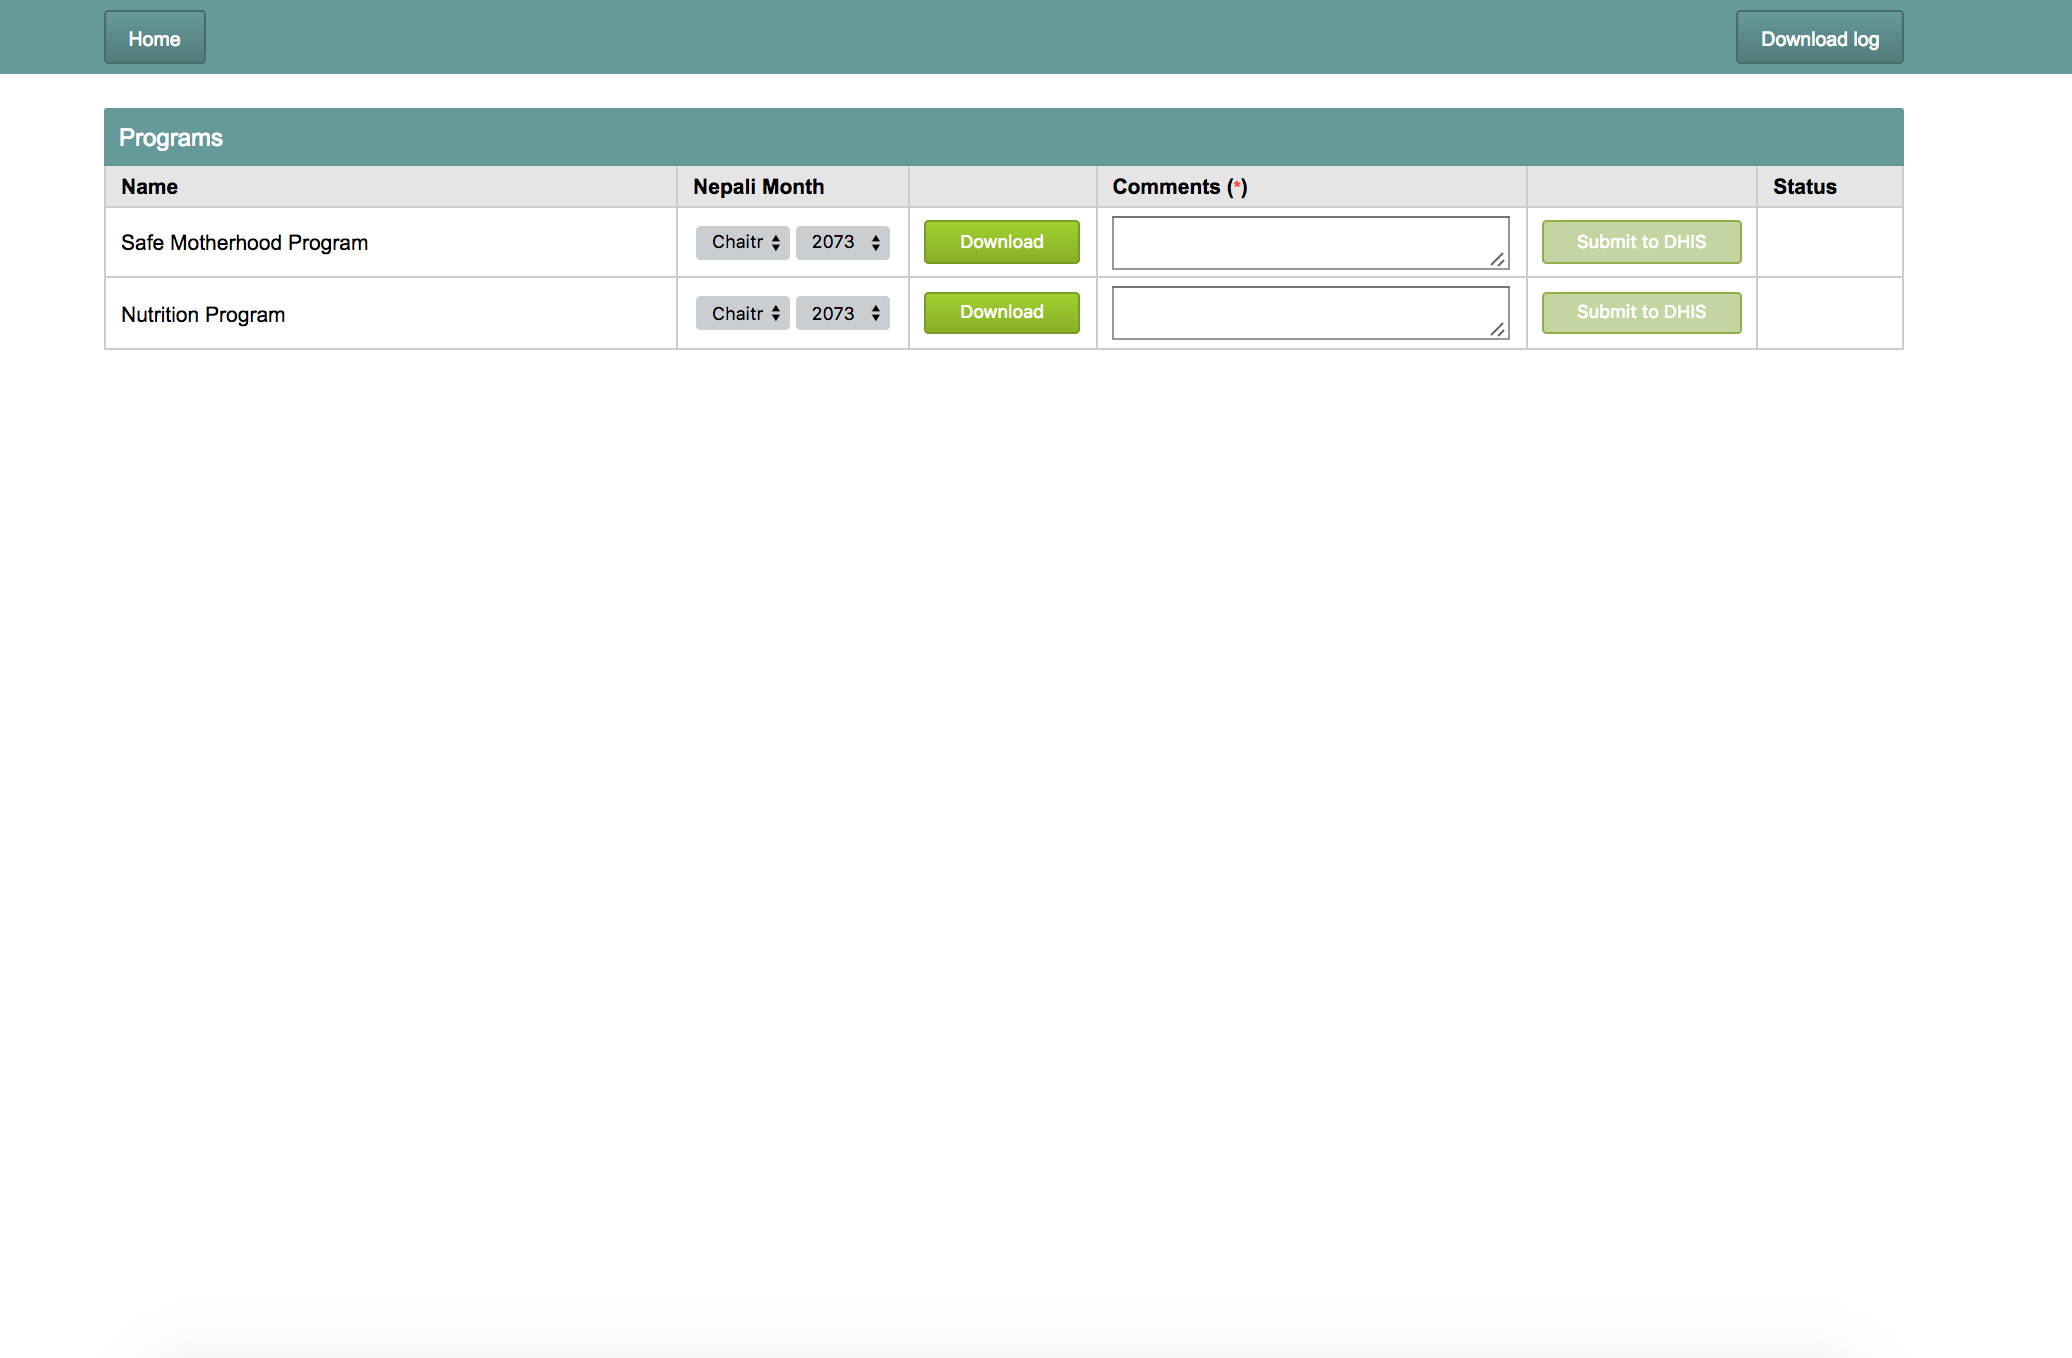
Once you open the app you land on DHIS integration app page, where you select the month and year for given program, type a comment and submit report.

Configure New Program
- Configure the concatenated reports for the program
Put the following configuration in the concatenated report to make it DHIS2 program.
Code Block language text theme Emacs "DHISProgram": true,
Example: Safe motherhood program
- Create a DHIS configuration file for the program with the name of program under '/var/www/bahmni_config/dhis2/' folder.
- To use different folder change 'dhis.config.directory' configuration at '/etc/dhis-integration/dhis-integration.yml'.
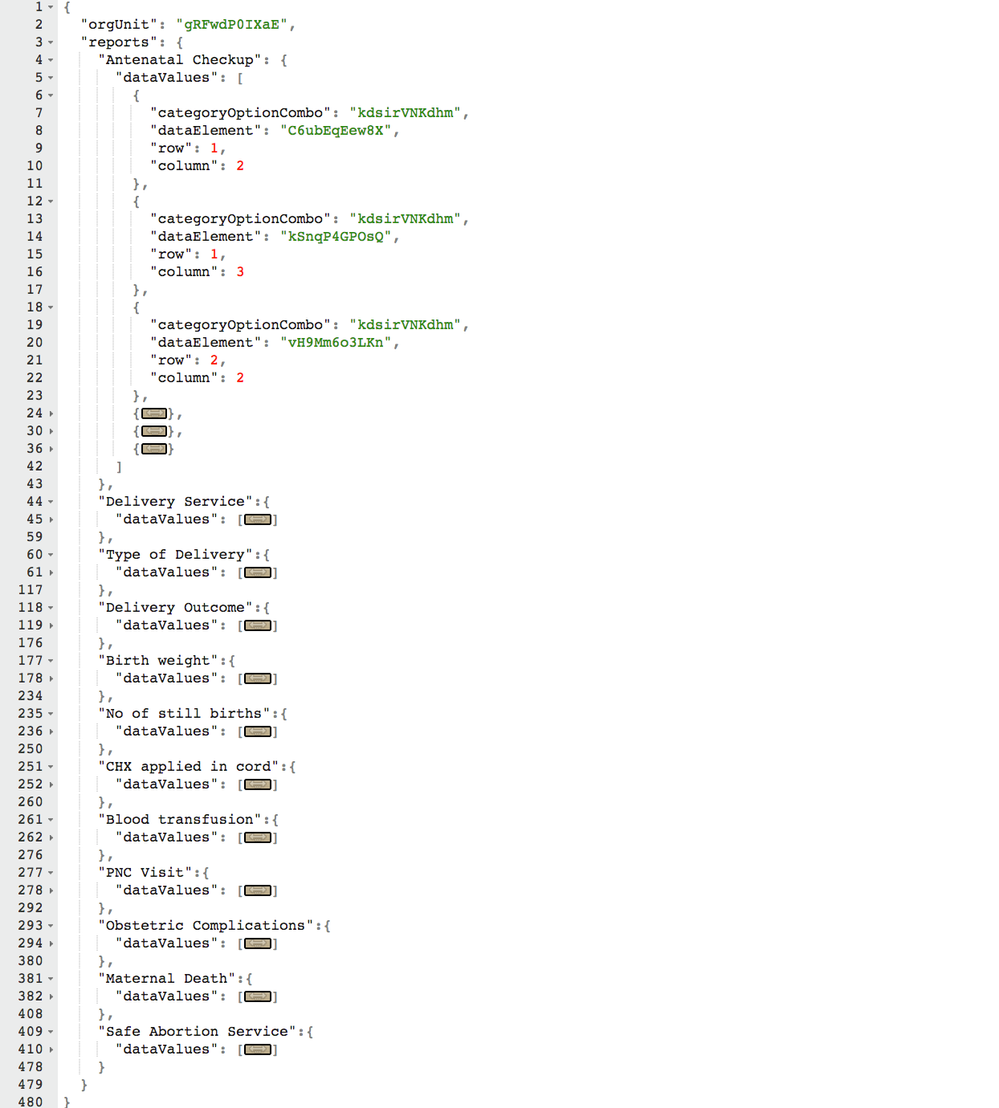
DHIS configuration file should have the following structure.
Code Block title DHIS Config { "orgUnit": "<orgUnitId | find it from DHIS instance>", "reports": { "<name of 1st sub report | find it from reports.json>": { "dataValues": [ { "categoryOptionCombo": "<category option combination id | find it from DHIS instance>", "dataElement": "<data element id | find it from DHIS instance>", "row": <row number of the cell | find it from output of the SQL report>, "column": <column number of the cell | find it from output of the SQL report> }, { "categoryOptionCombo": "<category option combination id | find it from DHIS instance>", "dataElement": "<data element id | find it from DHIS instance>", "row": <row number of the cell | find it from output of the SQL report>, "column": <column number of the cell | find it from output of the SQL report> }, ............more data element mappings............ ] }, "<name of 2nd sub report | find it from reports.json>": { "dataValues": [......] }, "<name of 3rd sub report | find it from reports.json>": { "dataValues": [......] }, ............more sub report mappings............ } }- An example configuration for Safe Motherhood program will look like the following

- Example: Safe motherhood program
...
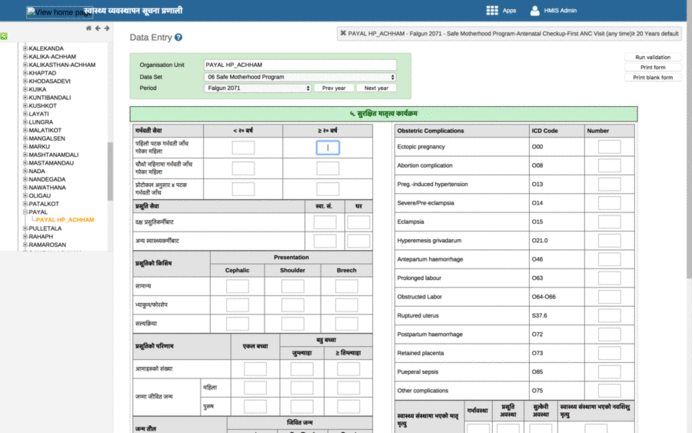
- Access the DHIS2 government server in your browser.
- Open data entry apps and select appropriate organisation and location.
- Once the data entry forms are visible, click on the input boxes where you enter the data.
- Right click on the input box and select "Inspect" from the options.
- Copy the Id of the html element from window (See image), it would look like the following string: "kSnqP4GPOsQ-kdsirVNKdhm-val".
- This string is in the format of "dataElementId - categoryOptionComboId - ...."
- These dataElementId and categoryOptionComboId need to be used in DHIS2 configuration file. Refer the below image.