| Warning |
|---|
This guide is currently In-Progress. Over the next few months, content will be added to it. If you have any suggestions or would like to add pages which talk about the functionality of Bahmni, please feel free to add them. |
Purpose and Benefits
<Introductory line taken directly from the FG>
Steps
<4-5 granular steps to implementing it. Each step should be accompanied with details, a screenshot and code snippets as required. If a screenshot is not part of the OOTB Bahmni implementation, call it out as such.>
1. Configure XYZ Tab

Image resolution 700px. Image and Caption centered in Bold.
Please refer to the code snippet below:
| Code Block | ||||
|---|---|---|---|---|
| ||||
Please set Language to Javascript and linenumbers to true
Please remove all blank lines using this link http://textmechanic.com/Remove-Empty-Lines.html |
Key Fields
<Any Key Fields. Highlight Mandatory Fields/Attributes with an asterisk.
Please add all key fields to the Glossary here>
| Key | Use | Mandatory |
|---|---|---|
Data Setup
<Links to any prior config / master data setup.>Purpose and Benefits
Bahmni uses Odoo mostly for Sales Management, Purchase Management, and for Inventory and Accounting. OpenERP has been adapted for health facilities to work seamlessly with Bahmni.
| Note |
|---|
Since Bahmni is based on Odoo/OpenERP, you can also refer to the Odoo documentation for in-depth information on Warehouse Management. Or here: https://doc.odoo.com/book/#books-link |
Steps
1. Configure OpenERP/Odo
Please refer to this link on details to Configure OpenERP/Odoo.
2. Setup Syncing between Odoo and Bahmni
Please refer to this link to setup Syncing between OpenERP/Odoo and Bahmni.
3. Configure Location, Warehouse and Shop
Please refer to this link to configure locations, warehouses and shops.
4. View Inventory at Different Locations
Since we have different locations we can analyze the current inventory or inventory over a date-range.
To do this navigate to Warehouse → Choose location → Select the required option.
A new location can be created by clicking on the "Create" button and giving appropriate parameters.
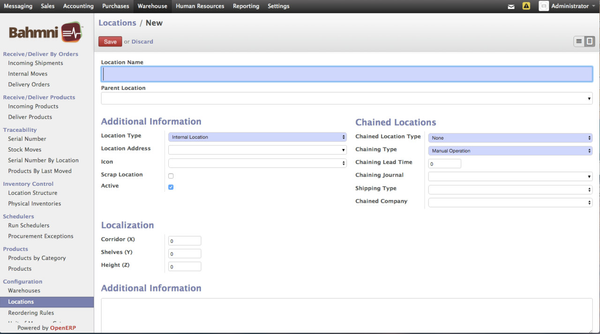
Creating a New Location in OpenERP
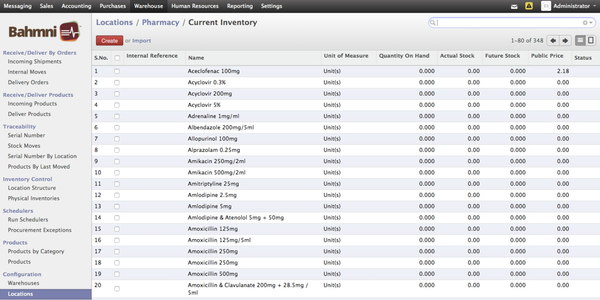
Current Inventory at Pharmacy Location
5. View Product Quantity at a Particular Location
Search for the product in the search bar to view the actual stock and the future stock for the particular location.
| Note |
|---|
|
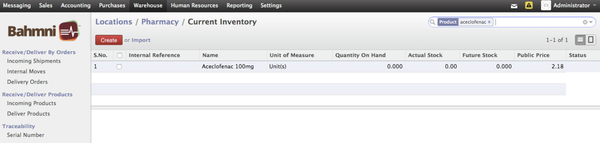
Aceclofenac Stock at Pharmacy Location
6. View Batch Level Stock Units Per Location
Navigate to "Serial Number by Location" to view batch level stock units per location.
| Note |
|---|
openERP does a double entry of drugs. For example, when a drug is ordered, it is reduced at the stock location, and increases correspondingly at the customer location so that the drug quantities balance-out. |
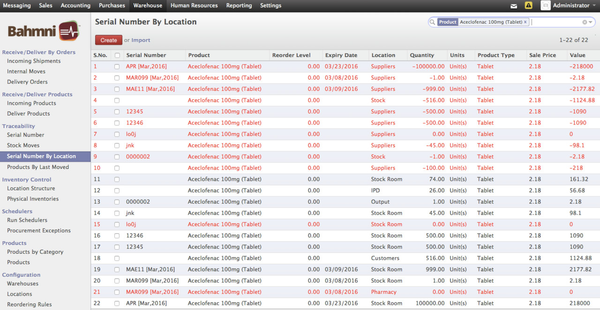
Batch Level Stock Units of Aceclofenac across Locations
7. Move Stock across Locations
This is used to move stock units across locations, such as X units of Aceclofenac from Stock Room to Pharmacy. This can be achieved by creating a new internal move from a configured source location to a configured destination location.
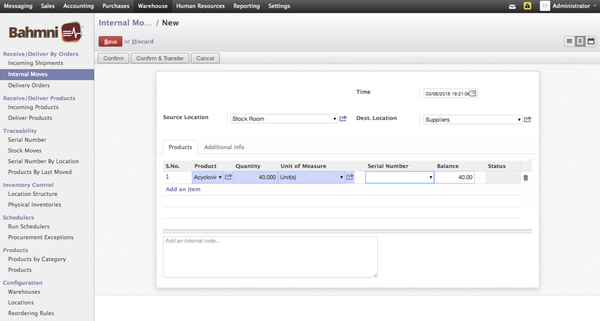
Moving Acyclovir Stock Units Across Locations
| Tip | ||||
|---|---|---|---|---|
| ||||
|
| Panel | ||||||
|---|---|---|---|---|---|---|
| ||||||
<Page Name> Stock / Inventory Management - Feature Guide |
| Panel | ||||||
|---|---|---|---|---|---|---|
| ||||||
<Page Name> Stock / Inventory Management - User Guide |