Creating and Managing Appointments
- Sruti Sridhar
- krishnanspace
About the Feature
With the help of appointment scheduling users will be able to create and manage appointments against a service for a patient.
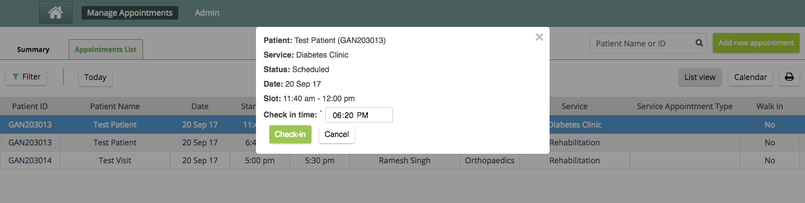
For example, An appointment is created for a Patient for the Diabetes Clinic on Monday at 11.20 AM. Once the patient reaches the hospital, the patient would be checked in. The patient will be guided to the assigned provider. The appointment will be deemed completed after consultation with the care provider. Alternately the appointment can also get cancelled or rescheduled to another date due to unavailability of the doctor. Also it is possible that the patient misses the appointment.
With the "Manage Appointments" Tab the user will be able to replicate these activities and track appointments effectively.
Used By
Some of the possible users:
Registration Clerk: To assign appointments and to check in patients.
Provider: To view and schedule appointments for patients. Can also compete appointments post consultation
How is it Used?
Click on the Appointment Scheduling App on the Home page. Under the "Manage Appointments" tab of the app, click on Appointments List tab.
Create Appointments
Click on the "Add new Appointment" on the Appointments list Tab

2. The user will have to fill the details of the appointment in the Add new Appointment slider
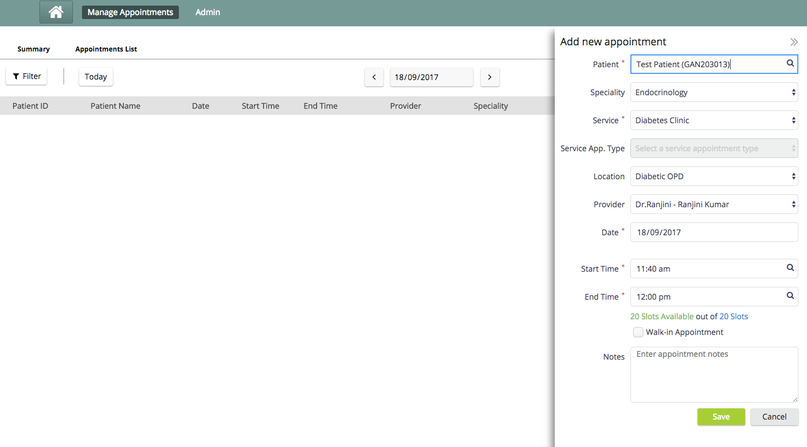
The following details are required to create an appointment:
Note: Selecting a Patient, Service/service type and Date is mandatory to create an appointment.
1. Patient : The Patient can be searched for using Patient name or ID
2. Speciality: The speciality can be selected from a dropdown to filter the services.
3. Service: The service is selected from the dropdown. This will further filter the appointment types under it.
4. Service Appointment Type: The service appt. type will be selected from a dropdown.
Note: Speciality and Service appointments can be turned off by configuration. Click here for more details.
5. Walk-in Appointment : Users can mark an appointment as a walk-in. By default appointments are marked as Scheduled.
6. Date of Appointment: This will be chosen from a date picker. Only current and future dates are allowed.
7. Time slot : Select the time slot for an appointment.
The dropdown will suggest possible slot times based on service availability.
End time will auto populate based on the duration of the service/ service appointment type. Default of 30 mins if no durations are mentioned.
Users can override the suggested times.
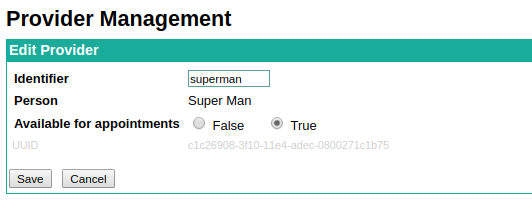
8. Providers: Select the provider for the appointment from the dropdown. Only those providers with provider attribute Available for appointments set to true will be shown. This setting is available in OpenMRS>Administration>Providers>Manage Providers.
Note: This feature only available from version 0.91 onwards.
9. Location : By default the location will be Service location. User can change the location as applicable.
To know how to tag locations as appointment locations, click here.
Warnings to the user
If service availability is defined, if the user chooses a day or timings outside the availability, there will be a warning to the user.
Booking a patient simultaneously in overlapping times will warn the user of the conflict.
In both cases mentioned above, the user can still go ahead and book an appointment by ignoring the warning.
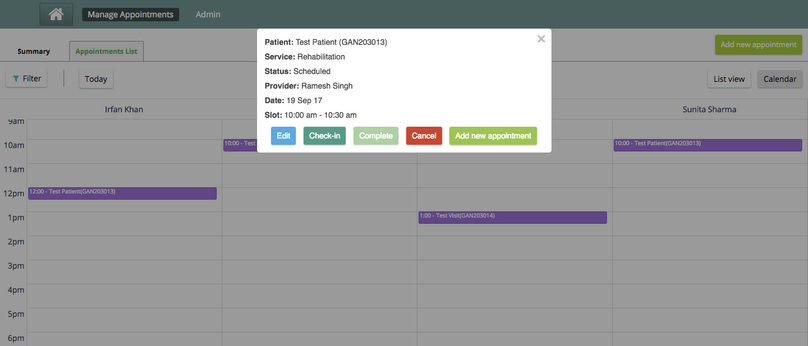
Edit Appointments
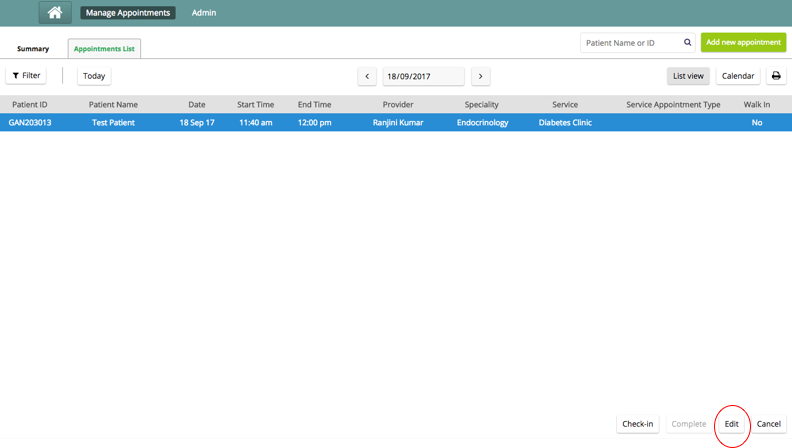
Click on the appointment that you want to edit.
Click on the edit button on the Button below
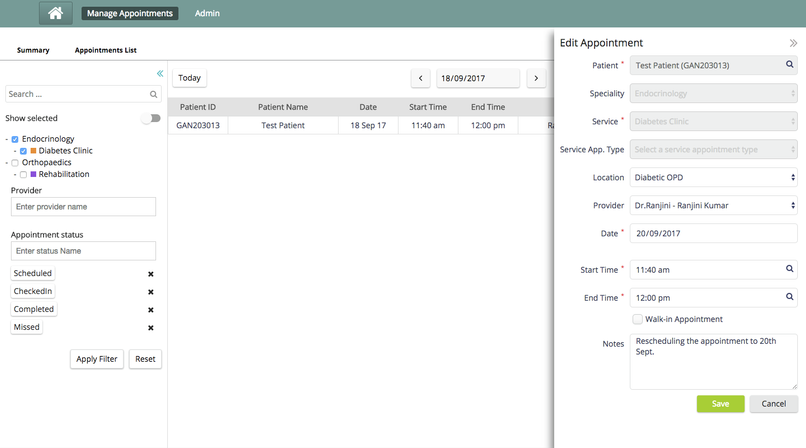
3. For scheduled and checked-in appointments one can edit the Service appointment type, Location, Provider and the Date/time of the appointment.
4. In case of past appointments or appointments that have been marked as Missed/Canceled/Completed, only Notes field can be edited.
Note: Edit of services for an appointment is turned off by default. Click here to know how turn on edit of services for an appointment.
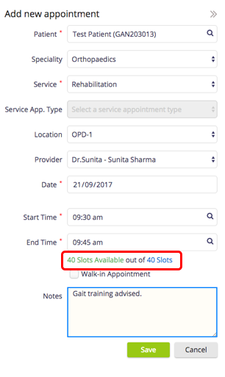
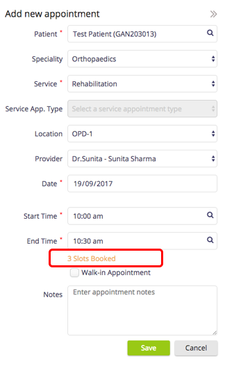
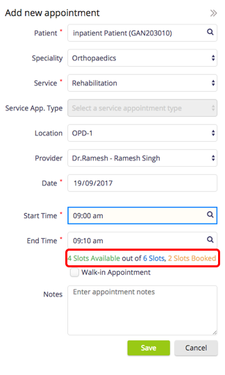
Slots Information:
When appointments are being booked or rescheduled the user will be prompted with the information of
- Open Slots : No. of Slots available for booking for a service
- Total Slots: Total No. Slots permitted for the service
- Booked Slots: Slots booked for the service
This information is calculated from either the Max load or the Availability of the service that is specified during defining the service.
The table below explains how the Open slots and Total slots calculations are done:
Duration of service | Start Time & End time of Service | Max Load | ‘Slots’ Calculation |
|---|---|---|---|
Present | Present | Not Specified | The Duration and Start/end time is used for calculating the total no. of slots for the defined service availability. |
Not specified | Present | Present | The Max load is used to show total no. of slots available. |
Present | Not specified | Present | The Max load is used to show total no. of slots available. |
Present | Present | Present | The max load for the defined service availability will be displayed. |
Not specified | Present | Not specified | Total slots information will not be displayed. Only no. of patients booked for that particular availability is displayed. |
| Present | Not specified | Not specified | Total slots information will not be displayed. Only no. of patients booked for that particular service is displayed. |
| Not specified | Not specified | Not specified | Total slots information will not be displayed. Only no. of patients booked for that particular service is displayed. |
This is only an indicative information for the user and will not stop the user from overbooking.
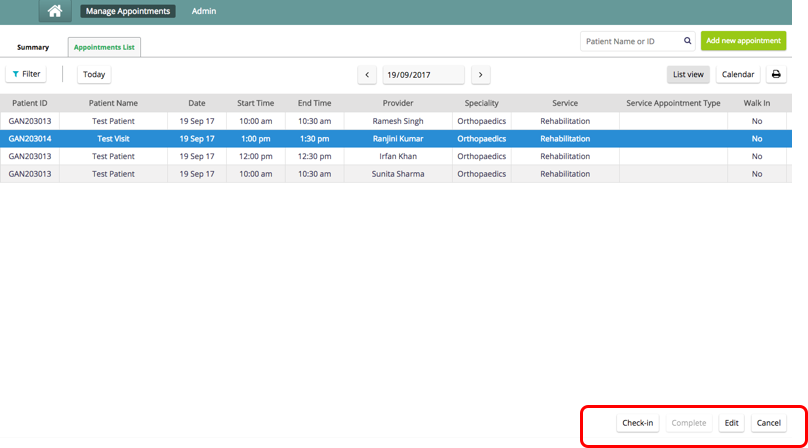
Status of Appointment
Appointments can be marked as Checked-in, Cancelled or Complete.
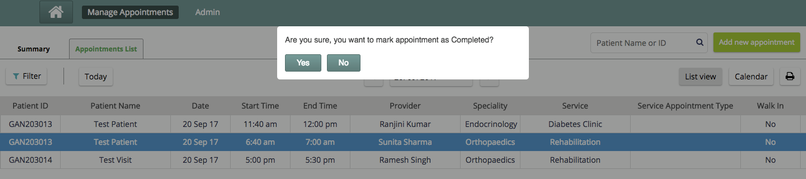

Schedulers can mark appointments as Complete or Missed at the end of defined frequency.
Validations for Appointment Status
A ‘Cancelled’ , ‘Completed’ and a ‘Missed’ Appointment should not be available for editing to change to any other status.
A Scheduled appointment can move to any of the statuses.
A ‘checked in’ appointment can only be marked as Completed, Missed or Cancelled.
A checked-in Appointment if rescheduled, the status must go back to being ‘Scheduled’ until checked-in again for the rescheduled time.
Related content
The Bahmni documentation is licensed under Creative Commons Attribution-ShareAlike 4.0 International (CC BY-SA 4.0)